 April 2012 update.
I feel great
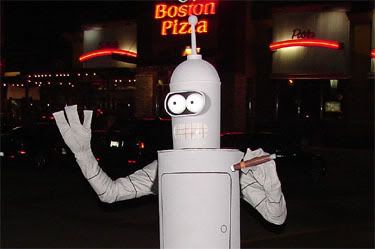
 thanks to the kudos from fellow bloggers as well as from other costumed Halloween lovers at the Boston Pizza
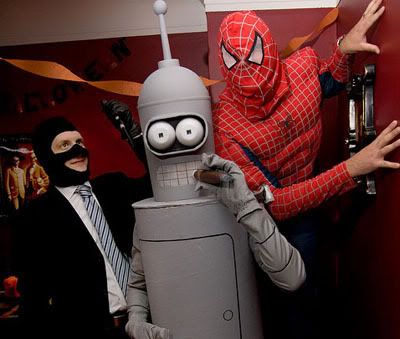
Costume Contest I won October 31. Therefore, I thought a post on how I made my Bender costume was in order.
My homemade Bender costume started off as a hope. I knew it would be difficult even if I could find the parts I needed. But more importantly, I knew it was going to be impossible if I couldn't find the proper head. That's why I started in August.
Strolling through a Zellers one afternoon Suz stumbled across a $7
plastic garbage can, quite by luck. I popped the top off and slid it over my head. It was perfect.
I began working on the body first. I bought a Quick-tube, or sono-tube, for pouring concrete footings from Home Depot for $9. I bought the largest one they had, 12" diameter. As most people would agree, 12" is too small, so I split it open. It was also too tall for my torso, so I cut it almost in half. It was also too yellow, but that was easy to fix.
Using an angled strip from the bottom half, I wedged it into the backside, where my shiny metal ass would be, and screwed it together from the inside. I used other small curved bits of leftover tube as the joiners. The cracks were filled with Polyfilla and I later sanded them smooth.
See Bender's body here.
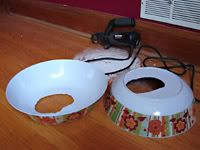 While the
 glorious amounts of Polyfilla dried, I worked on the footcups. They were easy. I bought a pair of plastic salad bowls from the dollar store, flipped them upside down and, using a Dremel, cut feet holes out of them. I took an old pair of Nike's and glued the toe to the front of Bender's footcup. The glue (Goop) was flexible and allowed me to move the shoe around a bit. Finally, I painted them with grey primer, and attached a flap of grey fabric to cover my black shoes.
Back on the body, I carefully measured where my arms should go, and using a jigsaw, cut out arm holes in the sides. The tube would sit on my shoulders, so I attached a couple of spongey rubber pads that were a family heirloom, passed down from my grandpa to my dad, and finally to me. True story.
Once I climbed inside it I realized I could neither sit nor walk up stairs. With the jigsaw, I cut a flap in the front, but left it attached in the middle. Using carpenter's glue I attached a tab on either side of the flap and glued a pair of attracting neo magnets to each one plus the flap. The flap could be popped open with my thigh and would slam back down and be held in place by the expensive magnets.
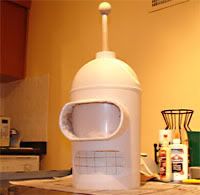 Bender's head
 is unique and instantly recognizable. I knew I had to get it right so I was very careful and spent the most time here. First, I made
the visor where the eyes would go. I made it from cardboard and added popsicle sticks for strength and a smoothness that bent cardboard is not known for. I filled in the little gaps with Polyfilla and sanded till it was perfect.
I know Bender is 30% iron, but in my case, he was 30% filler & adhesives. Using more Goop glue, I sealed the garbage flap in the top of the dome. Then I filled in the gap with, yep, you got it, more Polyfilla.
Using white caulking, I sealed the finished visor to the garbage can and smoothed it with my supreme caulking skills. I cut the top of a spray-paint can in half - horizontally - and glued it to the top of the garbage can to form the base of Bender's antenna. On that I attached a tapered tube of rolled paper. Finally, I mounted a wooden doll's head, which I purchased at Michael's for about $1.69.
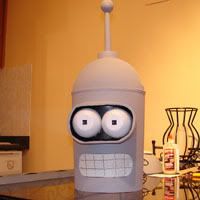 The Dremel
 was too crazy and unpredictable to cut the mouth out, so I carefully drilled about 40 pilot holes around the mouth perimeter, then cut through them all with a nice blade. Once I sanded the edges smooth the head was ready for paint. Again, I used grey primer, as it matches Bender's colour perfectly.
The dollar store provided Bender's eyes. I used the domes off the packaging of two micro remote control cars, carved them to fit the contour of the garbage can, and spray painted them white. I painted the inside of the visor black, then glued the eyes in place. Once dry, I used a black Sharpie to draw his square pupils.
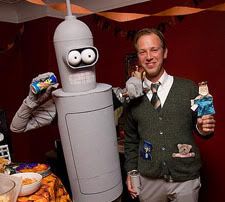
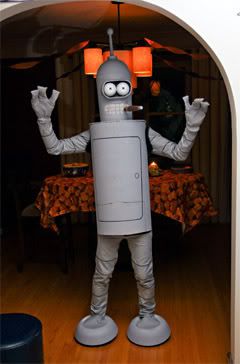
The fabric for Bender's arms & legs was cheap. I found 1.7 metres of the most perfect grey material at Fabricland for about $7. I had a friend of Suz's family sew this fabric onto some cheap clothing I picked up at Value Village for about $10. She also sewed the most excellent 3-finger square gloves from the same material. Here I am
trying it on.The mouth area is where I see out. I used a hot glue gun and attached some sheer fabric that used to hang in our bedroom window. Suz hated it, so it came down, and this seemed like a great use for it. I drew Bender's teeth with a black Sharpie.
Inside the helmet I glued two strips I cut from popsicle sticks. The first reason was to add strength incase the mouth was poked from the other side, and secondly, to hold a neo magnet in place.
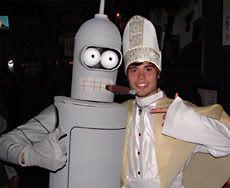
This magnet was the key to awesomeness. I glued the magnet's mate to the end of a big plastic novelty cigar that I picked up at Party Packager's for 49 cents. With the magnets, I could put the cigar "in" my mouth whenever I wanted. It worked flawlessly, and the Boston Pizza patrons agreed with their cheering.
This was the most elaborate costume, by far, I've ever attempted. Total cost was close to $100 which included a few extra parts I ruined and had to buy again. Total labour was about 25 fun and stressful hours. Everyone but my dad thought I was crazy. But it all paid off in the end when I won enough money to cover the cost of making it, plus more.
So, if you ever want to attempt a Bender costume, I hope this helps. If not, well, you know what you can bite.
Labels: Bender, costume, Halloween
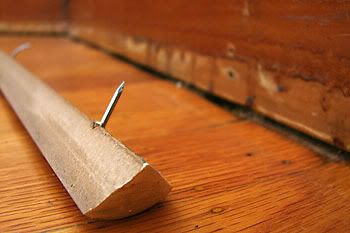
 Hidden behind was a large gap. The swell auditor suggested I fill this gap with silicone to stop cold air from creeping in.